| Version 23 (modified by chunter, 12 years ago) (diff) |
|---|
WARPLab 7
- Downloads
Getting Started
- Sample Buffer Sizes
- Automatic Gain Control
- Examples
- Extending WARPLab
- Debugging Errors
- Porting Code
- Benchmarks
WARPLab 7 Framework
WARPLab 7 Reference Design
Reference Design Modules
- Node
Interface Group
Baseband
Transport
Trigger Manager
Hardware
Getting Started
- Requirements: At least two WARP nodes, a PC with MATLAB and an Ethernet switch. Please note: the current WARPLab reference design uses a 100Mb Ethernet link for WARP v1 and a 1000Mb Ethernet link for WARP v2/v3. Please use an appropriate speed Ethernet switch with your hardware.
- Install Peter Rydesäter's open-source TCP/UDP toolbox for MATLAB (get it free from MATLAB Central). You may need to re-compile the pnet mex source for your version of Windows/MATLAB. For 64-bit Windows 7, see this forum post.
- Download the WARPLab Reference M-code to your PC. The instructions are available here. In the final step you can choose the appropriate version to add to the path. For example, to add Version 6.1 of the Reference M-Code the path is 'C:\WARP_Repository\ResearchApps\PHY\WARPLAB\WARPLab_v06_1\M_Code_Reference'. Information about the latest version of the WARPLab reference M-Code can be found here?.
- Connect your PC and two WARP boards to a common Ethernet switch. Ideally, nothing else should be connected to the same switch.
- Set your PC's IP address to 10.0.0.200
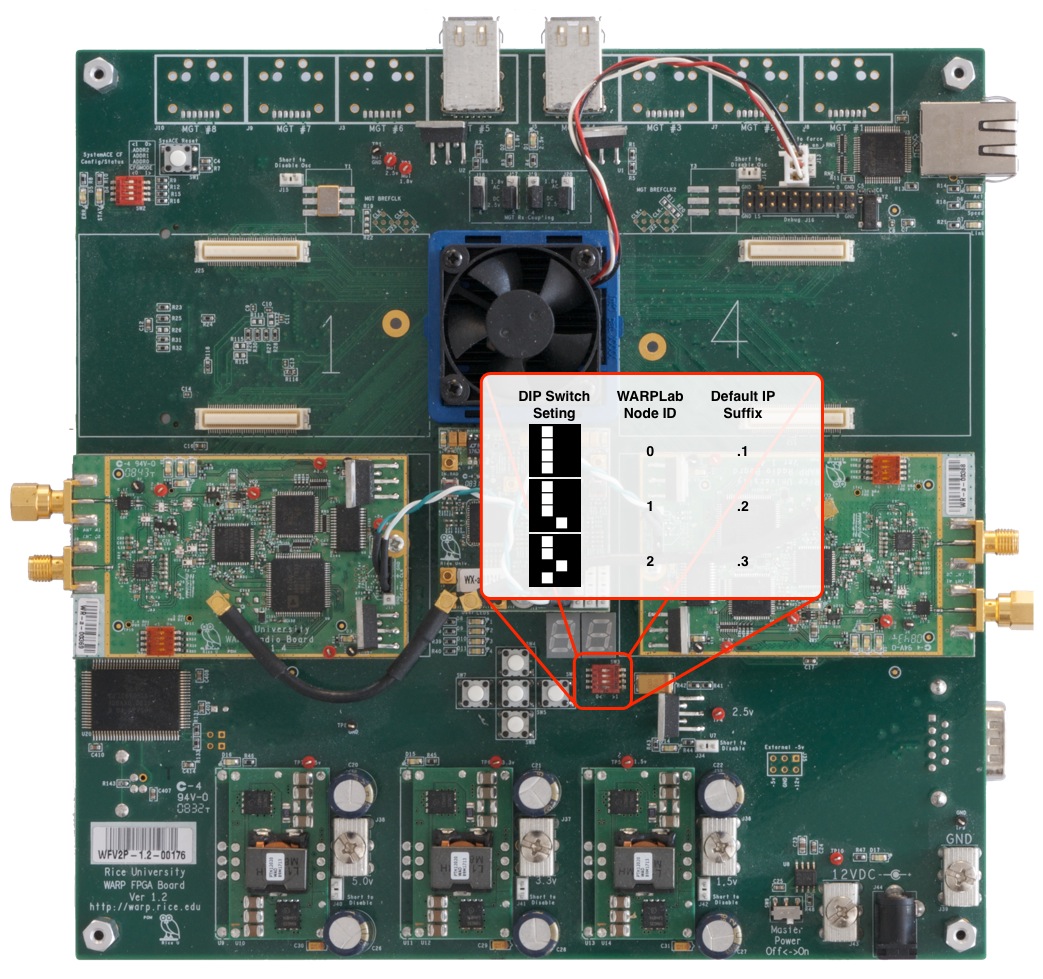
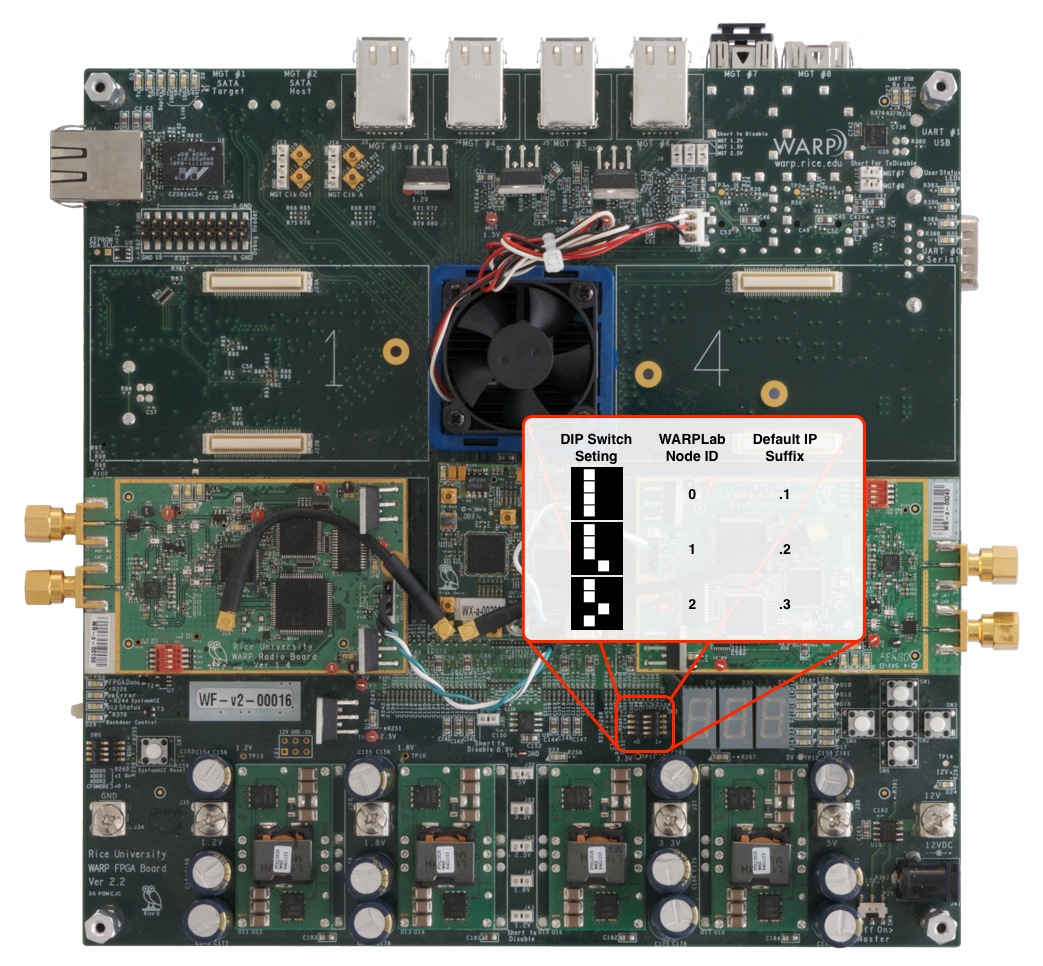
- Set the DIP switches on the two WARP boards to zero (0000) and one (0001).
 |  | 
|
| WARP v1 (Enlarge Image) | WARP v2 (Enlarge Image) | WARP v3 (Enlarge Image) |
- Download the WARPLab bitstream to both boards. The latest WARPLab bitstream is available here?. A Virtex-II Pro FPGA kit uses the _FPGAv1 suffix while the Virtex-4 FPGA kit uses the _FPGAv2 suffix for all files. The bitstream can be downloaded either via an external JTAG cable, via a USB cable (connected to the FPGA board's USB port) or a CompactFlash card. Instructions on formatting and loading systems on to a Compact Flash are available here. After downloading the bitstreams, the right hex display on the WARP boards should show a single digit 1 for the board with DIP switch set to zero and a single digit 2 for the board with DIP switch set to one. This digit is the last octet of the board's IP address (10.0.0.1 or 10.0.0.2).
- Try one of the examples. The GUI (warplab_mimo_2x2_GUI and the warplab_siso_example_TxRx) are the best ones to start with. The latest version of the M-Code examples is available here?.
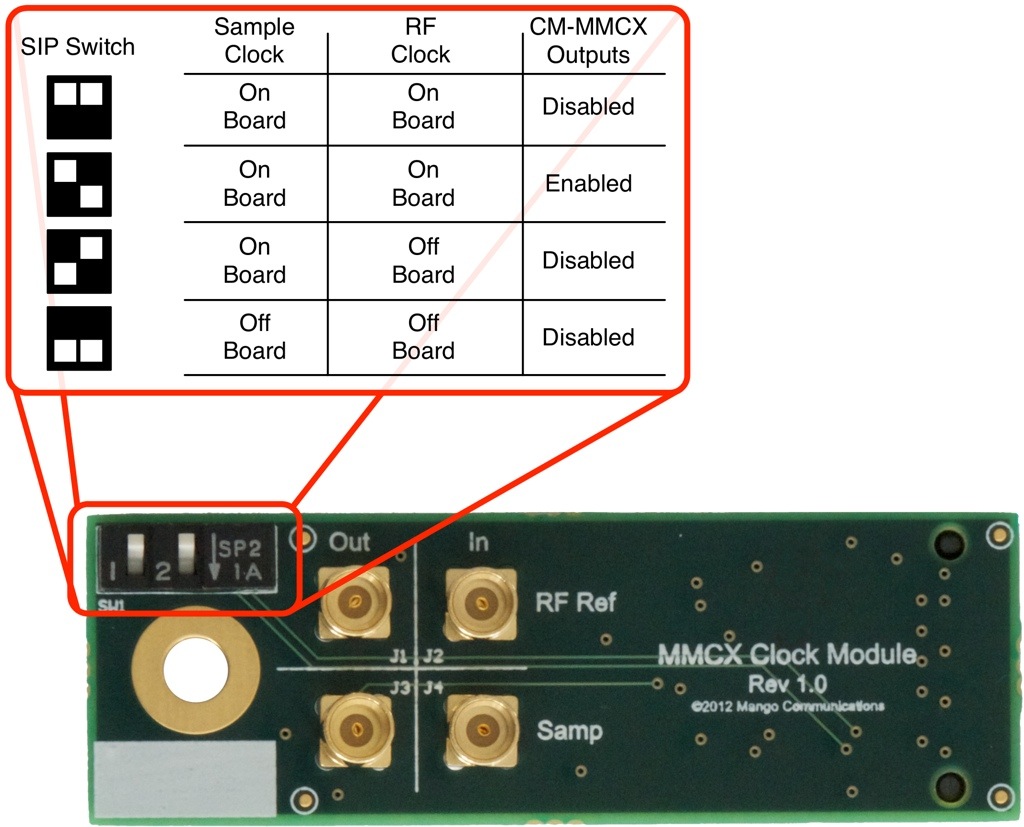
Note: For WARP v1 and v2, this design assumes clocks are connected according to the convention illustrated in the clock connection howto.
Attachments (4)
- v3Switch.jpg (188.5 KB) - added by chunter 12 years ago.
- v2Switch.jpg (315.6 KB) - added by chunter 12 years ago.
- v1Switch.jpg (312.2 KB) - added by chunter 12 years ago.
- CM-MMCXSwitch.jpg (175.3 KB) - added by chunter 11 years ago.
Download all attachments as: .zip