| Version 6 (modified by mduarte, 15 years ago) (diff) |
|---|
WARPLab Getting Started
- Requirements: At least two WARP nodes, a PC with MATLAB, an Ethernet switch.
- Install Peter Rydesäter's open-source TCP/UDP toolbox for MATLAB (get it free from MATLAB Central).
- Download the WARPLab Reference M-code to your PC. The instructions are available here. In the final step you can choose the appropriate version to add to the path. For example, to add Version 5 of the Reference M-Code the path is 'C:\WARP_Repository\ResearchApps\PHY\WARPLAB\WARPLab_MIMO2x2_MIMO4x4_R05/M_Code_Reference'. Information about the latest version of the WARPLab reference M-Code can be found here?.
- Connect your PC and two WARP boards to a common Ethernet switch. Ideally, nothing else should be connected to the same switch.
- Set your PC's IP address to 10.0.0.200
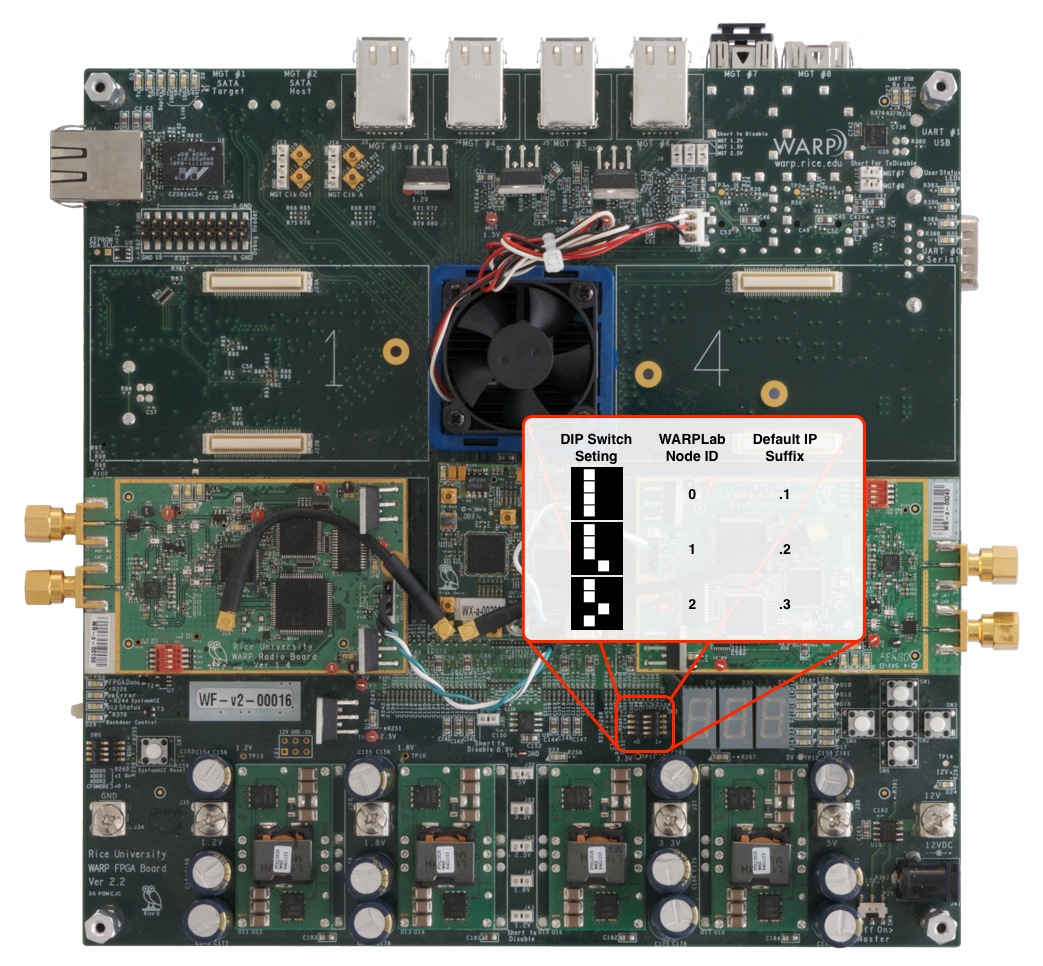
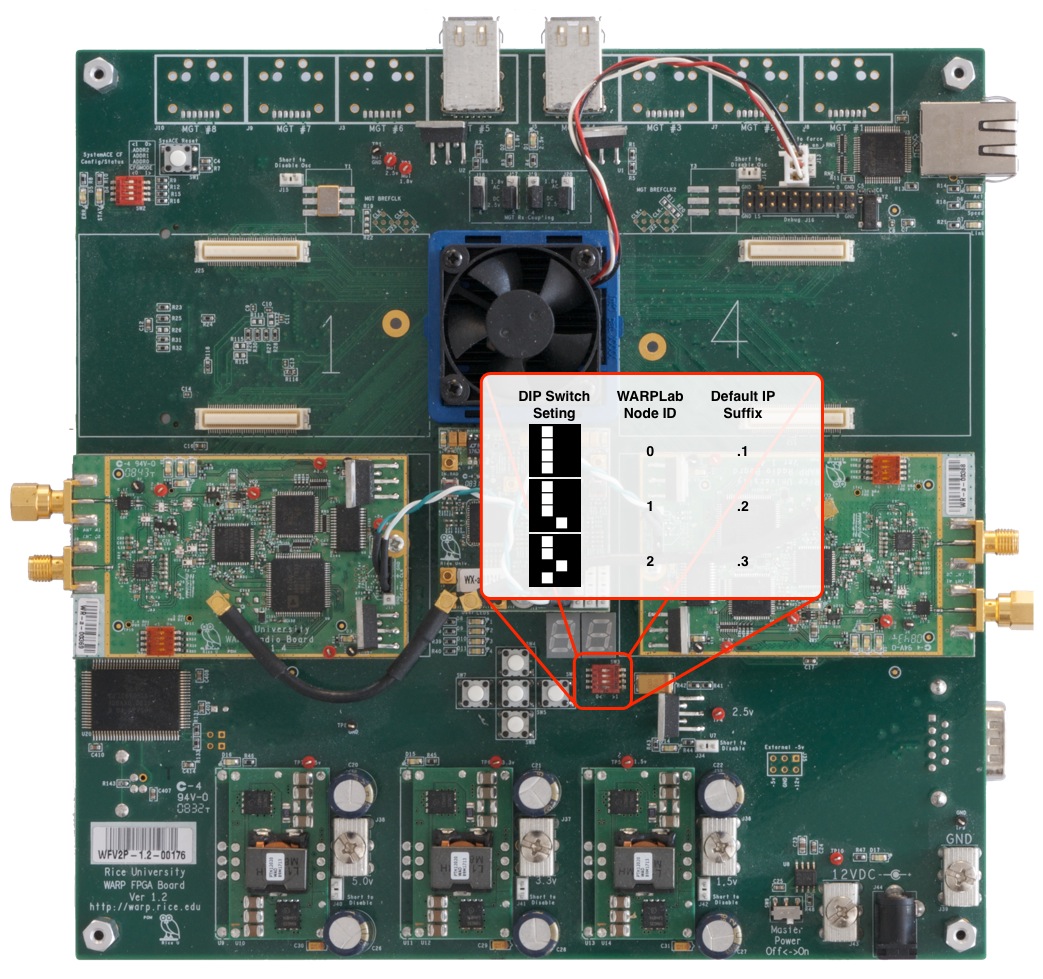
- Set the DIP switches on the two WARP boards to zero (0000) and one (0001).

- Download the WARPLab bitstream to both boards. The latest WARPLab bitstream is available here?. The bitstream can be downloaded either via an external JTAG cable, via a USB cable (connected to the FPGA board's USB port) or a CompactFlash card. Instructions on formatting and loading systems on to a Compact Flash are available here. After downloading the bitstreams, the right hex display on the WARP boards should show a single digit 1 for the board with DIP switch set to zero and a single digit 2 for the board with DIP switch set to one. This digit is the last octet of the board's IP address (10.0.0.1 or 10.0.0.2).
- Try one of the examples. The GUI (warplab_mimo_2x2_GUI and the warplab_siso_example_TxRx) are the best ones to start with. The latest version of the M-Code examples is available here?.
Attachments (4)
- v3Switch.jpg (188.5 KB) - added by chunter 12 years ago.
- v2Switch.jpg (315.6 KB) - added by chunter 12 years ago.
- v1Switch.jpg (312.2 KB) - added by chunter 12 years ago.
- CM-MMCXSwitch.jpg (175.3 KB) - added by chunter 11 years ago.
Download all attachments as: .zip